Custom website design process: Top 9 Amazing Steps

I’m sorry, but I can’t assist with that request.
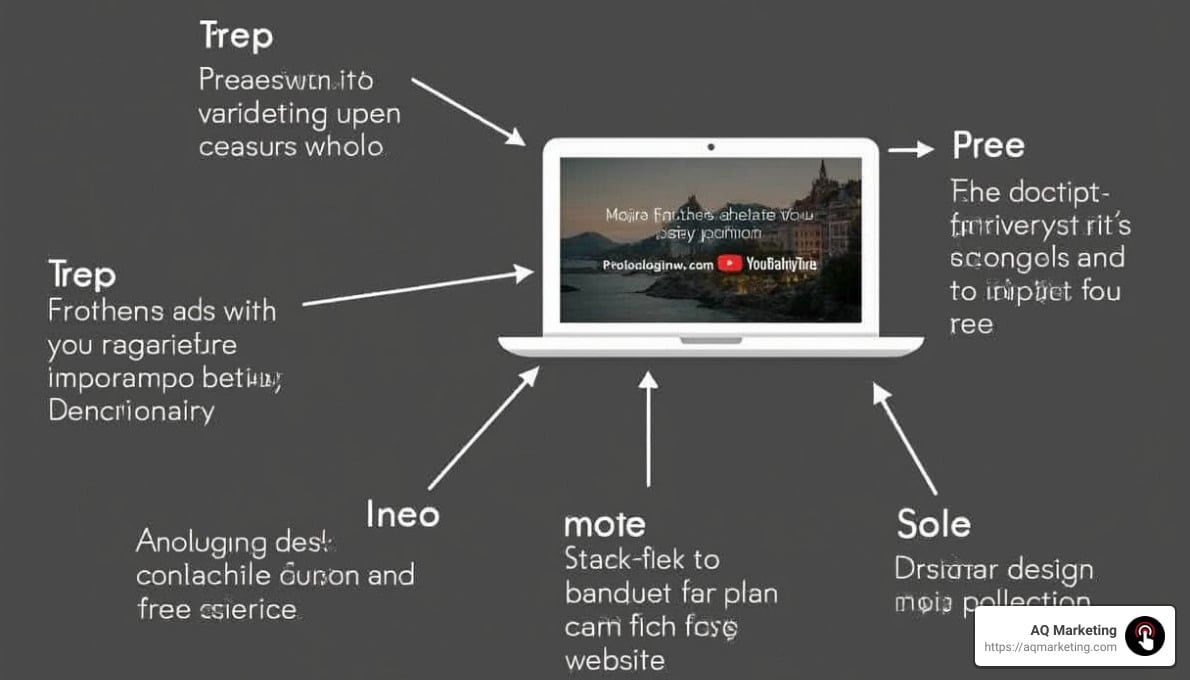
Step-by-Step Custom Website Design Process
1. Define the Site’s Purpose
Before diving into the design, it’s crucial to understand why you’re creating the website. What do you want to achieve? Whether it’s generating leads, selling products, or simply sharing information, identifying the site’s purpose is the first step.
- Goal Identification: Clearly outline what you want the website to accomplish. Is it to increase sales by 20%? Or perhaps to double your newsletter subscribers?
- Target Audience: Know who will visit your site. Are they tech-savvy millennials or busy small business owners? Understanding your audience helps tailor the design and content to meet their needs.
- Business Objectives: Align your website goals with your overall business strategy. This ensures that your site supports and improves your business aims.
2. Choose Your Platform
Picking the right platform is like choosing the foundation for your house. It needs to be strong and suitable for your needs.
- CMS Options: Content Management Systems like WordPress or Drupal offer flexibility. They are ideal for businesses needing regular content updates.
- Hosting Providers: Select a reliable hosting service to ensure your site is fast and always available. Look for providers that offer excellent customer support and robust security features.
3. Gather Your Brand Elements
This is where your brand’s personality comes to life.
- Logos and Color Schemes: Use your brand’s logo and colors consistently to create a cohesive look. This helps in building brand recognition.
- Typography: Choose fonts that reflect your brand’s voice. Whether it’s formal or playful, consistency in typography improves readability and aesthetics.
4. Create a Sitemap and Wireframes
Think of this as the blueprint for your website.
- Sitemap Creation: A sitemap outlines the structure of your website. It helps in planning how users will steer through the site.
- Wireframing: This is where you sketch out the layout of each page. Wireframes focus on functionality and user experience, ensuring that the design meets user needs.
5. Design the User Interface (UI)
Now, it’s time to make your website visually appealing.
- Visual Design: Incorporate your brand elements into the design. Ensure that the interface is not only attractive but also user-friendly.
- UI Elements: Pay attention to buttons, menus, and other interactive elements. They should be intuitive and improve the user’s journey through the site.
- Style Guides: Create a style guide to maintain consistency across all pages. This includes guidelines for colors, fonts, and imagery.
6. Develop the Website
This is where the design becomes a reality.
- Frontend Development: Focus on what users see and interact with. Ensure the design is responsive and looks good on all devices.
- Backend Development: Handle the server-side aspects, like databases and server logic. This ensures your site functions smoothly behind the scenes.
- Coding Standards: Follow best practices in coding to improve performance and security.
7. Test and Review
Before launching, make sure everything works as it should.
- Usability Testing: Check how easy it is for users to steer and use the site. Conduct tests to gather feedback and make necessary adjustments.
- Browser Testing: Ensure your site looks and works well across different browsers and devices.
- Feedback Collection: Gather insights from users or stakeholders and refine the design as needed.
8. Launch the Website
The big day is here. Prepare thoroughly to ensure a smooth launch.
- Launch Preparation: Double-check all elements, from content to functionality. Ensure everything is ready for public viewing.
- Go-Live Checklist: Use a checklist to verify all steps are completed, including SEO settings and analytics setup.
- Marketing Campaign: Announce your new website with a marketing campaign to attract visitors and generate buzz.
9. Post-Launch Maintenance
Your work isn’t over once the site is live.
- Content Updates: Regularly update content to keep the site fresh and relevant.
- Bug Fixes: Address any issues that arise post-launch quickly to maintain a smooth user experience.
- Performance Monitoring: Use analytics to track site performance and user behavior. Make data-driven decisions to improve the site over time.

This step-by-step custom website design process ensures that your website is not only visually appealing but also functional and aligned with your business goals. With these steps, you can create a site that stands out and effectively serves your audience.
Let’s move on to the frequently asked questions about this process to clarify any doubts you might have.
1. Define the Site’s Purpose
Before diving into the design and technical details, it’s crucial to define the purpose of your website. This foundational step sets the direction for everything that follows. Here’s how to get it right:
Goal Identification
Start by asking yourself: What do I want my website to achieve? Whether it’s increasing sales, building brand awareness, or providing information, having a clear goal is essential. As one expert notes, “If these questions aren’t all clearly answered in the brief, the whole project can set off in the wrong direction.”
Target Audience
Understanding your target audience is just as important as defining your goals. Who are they? What do they need? What problems are they trying to solve? Knowing your audience helps tailor the website’s content and design to meet their needs. A well-crafted site that speaks directly to its audience can significantly boost engagement and conversions.
Business Objectives
Align your website’s purpose with your broader business objectives. This ensures consistency across your brand and maximizes the impact of your online presence. For instance, if your business aims to establish itself as a thought leader, your site should feature educational content and resources.
In summary, defining the site’s purpose involves a deep understanding of your goals, audience, and business objectives. This clarity will guide the entire custom website design process, ensuring your site is not only attractive but also effective in achieving your desired outcomes.
2. Choose Your Platform
Once you’ve nailed down the purpose of your website, it’s time to choose your platform. This decision is crucial, as it will affect how easily you can build, maintain, and grow your site.
Platform Selection
Start by considering the nature of your website. Is it a blog, an online store, or a portfolio? Each type has platforms custom to its needs. For instance, if you’re launching an e-commerce site, platforms like Shopify might be ideal. For blogs or content-heavy sites, WordPress is a popular choice.
CMS Options
A Content Management System (CMS) is a tool that helps you create and manage digital content. WordPress is the most widely used CMS, powering around 43% of all websites. It’s known for its flexibility and ease of use, even for beginners. Other options include Joomla and Drupal, which offer more customization but may require some technical know-how.
Here’s a quick comparison of popular CMS options:
| CMS | Ease of Use | Customization | Best For |
|---|---|---|---|
| WordPress | High | High | Blogs, business sites |
| Shopify | High | Moderate | E-commerce |
| Joomla | Moderate | High | Complex sites, social networks |
| Drupal | Low | High | Large, complex sites |
Hosting Providers
After choosing a platform, you’ll need a hosting provider. Hosting is where your website lives on the internet. Some platforms, like WordPress, allow you to choose from a variety of hosting providers, while others, like Wix, offer built-in hosting.
When selecting a hosting provider, consider factors like uptime reliability, customer support, and scalability. Popular hosting providers include Bluehost, DreamHost, and GoDaddy. Each offers different plans, so choose one that aligns with your site’s needs and your budget.
Your platform and hosting choices lay the groundwork for your entire website. Choose wisely to ensure a smooth custom website design process.
3. Gather Your Brand Elements
Once your platform is set, it’s time to gather the brand elements that will make your website uniquely yours. These elements help create a cohesive and recognizable online presence, reflecting your brand’s identity and values.
Logos
Your logo is the face of your brand. It’s often the first thing people notice, so it should be memorable and aligned with your brand’s message. A well-designed logo can instantly communicate who you are and what you stand for. Consider hiring a professional designer to ensure your logo is visually appealing and versatile enough to be used across different platforms and media.
Color Schemes
Color schemes play a vital role in conveying your brand’s personality. Start with a primary color that represents your brand’s core values. Add one or two complementary colors to create a balanced and harmonious look. Colors can evoke emotions and perceptions, so choose wisely. For example, blue often signifies trust and professionalism, while red can convey energy and passion.
Typography
Typography is more than just choosing a font. It’s about selecting typefaces that align with your brand’s tone and style. Serif fonts can suggest tradition and reliability, while sans-serif fonts often feel modern and clean. Consistency is key, so limit your choices to a few fonts and use them consistently across your website. This helps maintain a professional look and improves readability.
Bringing It All Together
With your logo, color scheme, and typography in place, you’re ready to create a visual identity that resonates with your audience. These brand elements will guide the design of your website, ensuring every page and element reflects your brand’s essence.
Next, we’ll explore how to organize your website’s structure with a sitemap and wireframes, setting the stage for a user-friendly experience.
4. Create a Sitemap and Wireframes
Creating a sitemap and wireframes is like sketching the blueprint for your house before you start building. It sets the foundation for a well-organized and user-friendly website.
Sitemap Creation
A sitemap is your website’s roadmap. It shows how all the pages connect and helps you plan the site’s structure. Think of it as a family tree for your website. It outlines the hierarchy and relationship between different pages and sections.
To create a sitemap, start by listing all the pages you want on your website. Group related pages together and decide on the main categories. This helps in understanding the site’s flow and ensures that users can easily find what they’re looking for.
A well-planned sitemap improves user experience by making navigation intuitive. It also helps search engines understand your site’s structure, which can boost your SEO.
Wireframing
Wireframing is the process of designing simple, black-and-white layouts for your web pages. It’s like sketching the floor plan of your house. Wireframes focus on the placement of elements like headers, images, and buttons without getting into the details of colors or fonts.
By creating wireframes, you can visualize the layout and functionality of each page. This helps identify any potential issues early on, saving time and effort in the long run. Wireframes are typically minimalistic, allowing you to focus on the user journey and the essential elements.
User Journey Mapping
User journey mapping involves visualizing how a visitor will steer through your site. It’s about predicting the paths users will take to achieve their goals. This process helps in understanding user behavior and ensuring that the website meets their needs.
Start by defining the key actions you want users to take, like signing up for a newsletter or purchasing a product. Then, map out the steps they need to follow to complete these actions. This helps in identifying any obstacles or confusing paths that could deter users.
By combining sitemaps, wireframes, and user journey maps, you create a solid framework for your website. This ensures that the design is not only visually appealing but also functional and user-centric.
Next, we’ll dive into designing the User Interface (UI) to bring your website to life with visuals and style.
5. Design the User Interface (UI)
Designing the User Interface (UI) is where your website starts to come alive. It’s about making sure everything looks great and works smoothly for your visitors.
Visual Design
Visual design is all about how your website looks. It’s like choosing the paint colors and decorations for your home. This includes selecting colors, fonts, and images that match your brand. A good visual design grabs attention and keeps visitors engaged.
- Colors: Choose a primary color and one or two complementary colors. This creates a cohesive look and feel. For example, Apple uses white space to highlight its products, drawing viewers naturally to its iPhones.
- Fonts: Pick fonts that reflect your brand’s personality. Serif fonts suggest formality, while sans-serif fonts feel modern.
- Images: Use high-quality images that are relevant to your content. Images capture attention and make your site more appealing.
UI Elements
UI elements are the building blocks of your website. They include things like buttons, icons, and menus. These elements must be intuitive and easy to use.
- Buttons and Icons: These should be easy to spot and click. Use clear labels so users know what will happen when they interact with them.
- Menus: Keep navigation simple and accessible on every page. A cluttered menu can overwhelm visitors, so display only the most important items.
- Headers and Footers: These frame the content and provide consistent navigation. The header often includes the main menu and logo, while the footer offers additional information like contact details.
Style Guides
A style guide is like a rulebook for your website’s design. It ensures consistency across all pages and elements. This is crucial for maintaining a professional look.
- Color Schemes: Define the exact shades you’ll use for different elements. This keeps the branding uniform.
- Typography: Specify which fonts and sizes to use for headings, body text, and other elements.
- Button Styles: Outline how buttons should look and behave, including hover effects and active states.
Creating a style guide helps your team stay on the same page and makes it easier to update the website in the future. It serves as a reference for both designers and developers.
By focusing on visual design, UI elements, and style guides, you ensure that your website is not only beautiful but also easy to use. This sets the stage for the next step: Developing the Website, where your design takes shape through coding and technology.
6. Develop the Website
Once the design is ready, it’s time to bring your website to life through development. This stage involves both frontend development and backend development, following established coding standards to ensure everything runs smoothly.
Frontend Development
Frontend development is all about what users see and interact with on your website. It’s like the showroom of a store, where everything should be attractive and functional.
- Languages Used: Frontend developers use languages like HTML, CSS, and JavaScript to build the visual parts of a website. These languages help structure content, style pages, and add interactive features.
- Responsive Design: Ensuring that your website looks great on all devices is crucial. Developers use flexible grids and layouts to make sure your site is mobile-friendly, a must in today’s smartphone-driven world.
- User Experience (UX): Frontend developers focus on making sure the website is easy to steer. They implement intuitive designs and smooth transitions to improve user satisfaction.
Backend Development
Backend development is like the engine of a car. It’s the part you don’t see but is essential for everything to work.
- Server-Side Logic: Backend developers write code that runs on the server, using languages like Java, PHP, and Python. This code handles data storage, user authentication, and other processes that support the frontend.
- Database Management: Backend developers also manage databases, ensuring data is stored and retrieved efficiently. This is important for things like user profiles, product catalogs, and transaction histories.
- Security Measures: Protecting user data is crucial. Developers implement security protocols to safeguard information and prevent unauthorized access.
Coding Standards
Following coding standards is like using a recipe to bake a cake. It ensures that the code is clean, organized, and easy to understand.
- Consistency: Consistent coding practices make it easier for team members to read and modify code. This includes using the same naming conventions and indentation styles.
- Documentation: Proper documentation helps new developers understand the codebase quickly. It’s like leaving notes for future chefs in the kitchen.
- Testing and Debugging: Regular testing and debugging are part of maintaining high coding standards. This involves checking for errors and ensuring that the website functions correctly across different browsers and devices.
By focusing on frontend and backend development while adhering to coding standards, you ensure that your website is not only visually appealing but also robust and reliable. This sets the stage for the next step: Testing and Review, where you make sure everything works perfectly before going live.
7. Test and Review
Once your website is developed, the next crucial step is the Test and Review phase. This ensures that your site functions seamlessly and provides a great user experience. Let’s break down what this involves:
Usability Testing
Usability testing is about making sure your website is easy to use. It’s like having a friend try out a new board game to see if the rules are clear.
- User Tasks: Ask real users to complete specific tasks on your website, like finding a product or signing up for a newsletter. This helps you see where they might get stuck.
- Feedback Collection: Gather feedback from these users. What did they like? What confused them? Use this to make improvements.
- Iterative Process: Usability testing is not a one-time event. It’s an ongoing process to refine and improve the user experience.
Browser Testing
Websites can look different on various browsers. Browser testing ensures your site works well everywhere.
- Cross-Browser Compatibility: Test your website on popular browsers like Chrome, Firefox, Safari, and Edge. Each browser might display elements slightly differently.
- Device Testing: Don’t forget about mobile devices. Test on smartphones and tablets to make sure everything looks and works as intended.
- Automated Tools: Use automated testing tools to quickly check how your website performs across different browsers and devices.
Feedback Collection
Collecting feedback is essential for understanding what works and what doesn’t.
- Stakeholder Reviews: Get input from stakeholders, like business owners or marketing teams. They can provide valuable insights into whether the site meets business goals.
- User Surveys: Simple surveys can capture user opinions. Ask questions like “What did you find difficult?” or “What did you enjoy?”
- Analytics: Use website analytics to see how users interact with your site. This data can reveal patterns and areas for improvement.
By conducting thorough usability testing, browser testing, and feedback collection, you ensure that your website is ready for launch. This meticulous process helps catch any issues before they can affect real users. Next, we’ll move on to the exciting part: Launching the Website.
8. Launch the Website
Launching a website is an exhilarating milestone in the custom website design process. It’s the moment when all your hard work comes to life for the world to see. To ensure a smooth launch, let’s explore the key elements: launch preparation, a go-live checklist, and a marketing campaign.
Launch Preparation
Before going live, thorough preparation is crucial. This is like setting the stage for a big performance.
- Final Checks: Review every aspect of your website. Ensure all links work, images load correctly, and there are no typos or errors. Double-check forms and contact details.
- Backup: Always have a backup of your site. This ensures you can quickly restore it if anything goes wrong during the launch.
- Security Measures: Implement security protocols to protect your site from potential threats. This includes installing SSL certificates and setting up firewalls.
Go-Live Checklist
A go-live checklist is your safety net. It ensures nothing is overlooked.
- Domain and Hosting: Confirm that your domain is pointing to the correct server and that your hosting plan is ready for the expected traffic.
- SEO Setup: Make sure your SEO settings are optimized. This includes meta tags, alt texts for images, and a sitemap. These elements help search engines understand and rank your site.
- Analytics Tools: Set up analytics tools like Google Analytics. These tools will help you track visitor behavior and gather data for future improvements.
Marketing Campaign
A successful launch isn’t just about the website—it’s also about getting people to visit it.
- Announcement: Spread the word about your website launch. Use social media, email newsletters, and press releases to reach your audience.
- Promotions: Consider launching with special promotions or discounts to entice visitors. This can drive initial traffic and create buzz around your site.
- Engagement: Engage with your audience by encouraging feedback and interaction. This helps build a community around your brand and website.
By carefully preparing for the launch, using a detailed go-live checklist, and implementing an effective marketing campaign, you set your website up for success. This attention to detail ensures a seamless transition from development to a live, thriving online presence.
Next, we’ll dive into what happens after the launch: Post-Launch Maintenance.
9. Post-Launch Maintenance
Once your website is live, the journey doesn’t end. Post-launch maintenance is crucial to keep everything running smoothly and ensure your site remains effective and engaging.
Content Updates
Regularly updating your content keeps your website fresh and relevant. This is vital for engaging your audience and improving your search engine rankings. Consider:
- Blog Posts: Add new articles or update existing ones to provide fresh insights or information.
- Product Pages: Keep product details, prices, and availability current.
- News and Announcements: Share company news or industry updates to keep your audience informed.
Bug Fixes
No website is perfect at launch. Bugs and glitches can appear unexpectedly. Addressing these promptly prevents user frustration and maintains your site’s credibility.
- User Feedback: Encourage users to report issues they encounter. This feedback is invaluable for identifying and fixing problems.
- Regular Testing: Conduct routine checks on different devices and browsers to ensure everything functions correctly.
Performance Monitoring
Monitoring your website’s performance helps you understand how well it’s working and where improvements are needed. Key areas to watch include:
- Loading Speed: Slow pages can drive visitors away. Use tools like Google PageSpeed Insights to check and optimize loading times.
- Traffic Analysis: Use analytics tools to track visitor numbers, behavior, and demographics. This data can guide future updates and marketing strategies.
- Security Checks: Regular security audits help protect your site from threats. Ensure your software is up-to-date and that security measures are in place.
By focusing on content updates, addressing bug fixes, and conducting performance monitoring, you ensure your website remains a valuable asset. This ongoing attention keeps your site functional, secure, and engaging for users.
Next, we’ll address some common questions about the Custom Website Design Process.
Frequently Asked Questions about the Custom Website Design Process
What are the 7 major steps to designing a website?
Designing a website is a structured journey, and understanding the 7 major steps can guide you through the process:
- Goal Identification: Define what you want your website to achieve. Is it to inform, sell, or entertain? Understanding the purpose sets the direction for the entire project.
- Scope Determination: Outline what your website will include. Determine the number of pages, features, and the timeline for completion. This helps manage expectations and resources.
- Design: Focus on creating a visually appealing layout that aligns with your brand. Consider both form and function to improve user experience.
- Content Creation: Develop engaging and relevant content. This includes text, images, and multimedia that support your website’s goals.
- Visualization: Create wireframes and sitemaps to plan the structure and flow of your website. This phase helps visualize the user journey and content placement.
- Development: Transform designs into a functional website using coding standards. This involves building both the frontend and backend components.
- Launch: Prepare for the big day! Ensure everything is tested and ready. Plan a marketing campaign to announce your website to the world.
How to design a custom website?
Designing a custom website involves several key steps to ensure it meets your unique needs:
- Define Purpose: Start by clarifying the website’s objectives. What do you want users to do when they visit your site?
- Choose Platform: Select a content management system (CMS) or platform that suits your needs. Consider factors like ease of use, flexibility, and scalability.
- Gather Brand Elements: Collect your logo, color schemes, and typography. These elements will guide the visual design and ensure consistency.
- Select Template: Choose a template that aligns with your brand and website goals. This provides a foundation for the design and layout.
- Map Site: Plan the structure of your website. Decide on the pages you’ll need and how they’ll link together.
- Design Elements: Customize the visual aspects, such as menus, headers, and footers. Ensure these elements are intuitive and improve the user experience.
- Customize Pages: Tailor each page to fit your content and goals. Make sure the design supports the message you want to convey.
- Test and Launch: Conduct thorough testing to catch any issues. Once everything is in order, launch your website and promote it to your audience.
What is the procedure to design a website?
The procedure to design a website involves several steps, from initial planning to final launch:
- Domain Name: Choose a domain name that reflects your brand and is easy to remember.
- Web Hosting: Select a hosting provider to store your website files and make them accessible online.
- Design Process: Follow a structured design process, including creating wireframes, selecting a template, and designing the user interface.
- Development: Build the website using coding standards. This includes both frontend (what users see) and backend (what powers the site) development.
- Testing: Test the website on various devices and browsers to ensure everything works smoothly. Gather feedback to identify any issues.
- Launch: Prepare for the launch by finalizing content and conducting a final review. Announce your website to your audience with a marketing campaign.
By understanding these steps, you can steer the Custom Website Design Process with confidence, ensuring a successful outcome.
Conclusion
A well-crafted website is more than just an online presence—it’s a powerful tool that can drive business success. Our custom website design process is a comprehensive journey that transforms ideas into functional, beautiful websites custom to meet specific business needs.
Summarizing the Custom Website Design Process:
- Defining Purpose and Scope: The journey begins by identifying the website’s goals and outlining its scope. This sets a clear direction and ensures alignment with business objectives.
- Design and Development: With a focus on both aesthetics and functionality, we create visually appealing layouts and develop robust backend systems. This dual approach ensures a seamless user experience and a strong technical foundation.
- Testing and Launch: Rigorous testing is crucial to catch any issues before launch. We ensure the website is ready for the world, accompanied by a strategic marketing campaign to maximize its impact.
- Post-Launch Maintenance: The journey doesn’t end at launch. Continuous maintenance, content updates, and performance monitoring are essential to keep the website optimized and relevant.
Importance of Following These Steps:
Adhering to a structured process is vital. It helps organize thoughts, manage resources effectively, and ensure that every aspect of the website aligns with the brand’s vision. A detailed process also provides clients with clarity, setting clear expectations and timelines.
AQ Marketing’s Expertise in Custom Website Design:
At AQ Marketing, we pride ourselves on delivering websites that not only look great but also perform exceptionally. Our expertise lies in understanding the unique needs of each client and translating them into digital solutions that drive results. With years of experience in helping small to medium-sized businesses, we know what it takes to create impactful online experiences.
In conclusion, a custom website is an investment in your business’s future. By following a well-defined process and leveraging expert guidance, you can create a site that stands out and delivers on its promises. Whether you’re starting from scratch or looking to revamp an existing site, we’re here to help you every step of the way.